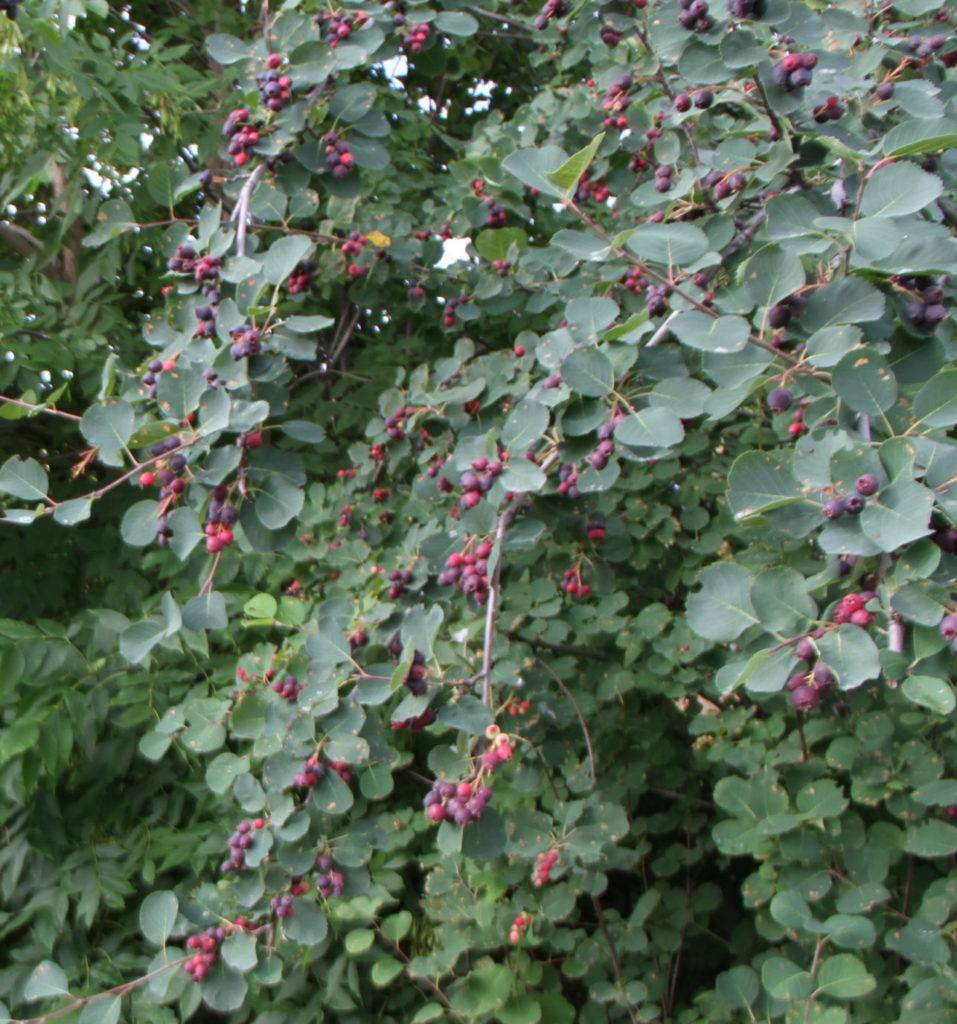
Growing Carrots in Alaska

Carrots, especially fresh Alaska grown carrots, are unmatched in taste and texture. A favorite of kids and adults alike, they’re excellent raw, in soups or stews, roasted, or even fermented. Carrot tops can also be eaten. I like to use them to make broth, juice, and pesto.

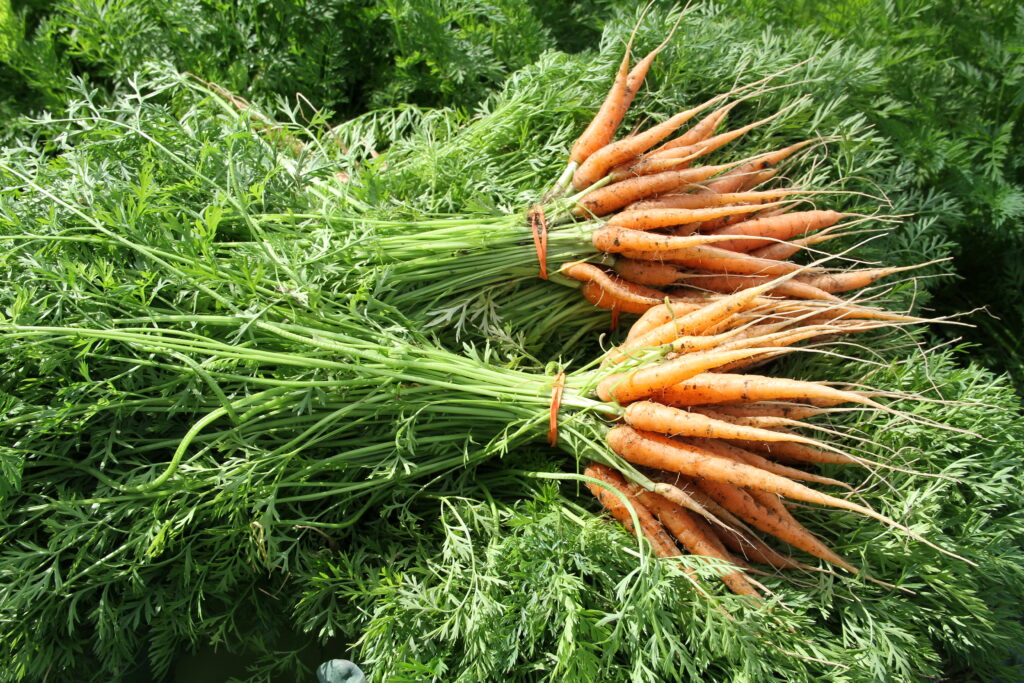
Two bunches of fresh Alaskan carrots

With proper thinning, and well-drained, loose soil, carrots thrive in Alaska. The biggest challenge with growing them is probably getting the spacing right and keeping them weeded. Carrot seeds are tiny so you almost always have to thin after they emerge. Some people like to use seed tape or a seeder and pelleted seeds to get their spacing just right—or even a paper-pot transplanter. But if you don’t plant thickly enough and you have poor germination rates, you’ll also have low yields. Germination can also take quite a few days (about two weeks, and longer in cooler soils). During this time, you have to ensure the seeds stay consistently moist. I like to cover the seeds with frost cloth to hold the moisture in and provide some extra warmth. I learned this trick from a farmer in Homer, Alaska. Unfortunately, while your carrots take their sweet time to emerge, weeds are eager to grow and soak up the water and nutrients intended for your carrots.  Continue reading

Growing Spring Flowers from Bulbs and Corms in Interior Alaska

In Interior Alaska, tulips and daffodils are uncommon. You might find them cozied up to a building, downtown in yards with slightly warmer soil due to the steam heat or in the hills.

For those of us who have lived farther south—even farther south in Alaska—we know that there’s a lot we’re missing in terms of spring color. Many spring-blooming bulbs, including tulips, are only hardy to Zone 3 or 4 on the USDA’s Plant Hardiness Zone Map. Some areas of Fairbanks are Zone 1 on paper. But recent, mild winters and a protected garden bed next to my house have inspired me to try my luck with tulips. 

One year, I planted whatever type of bulb looked pretty at the grocery store—I think it was Pinochio, a Greigii tulip. Those came up the first spring after a mild winter.

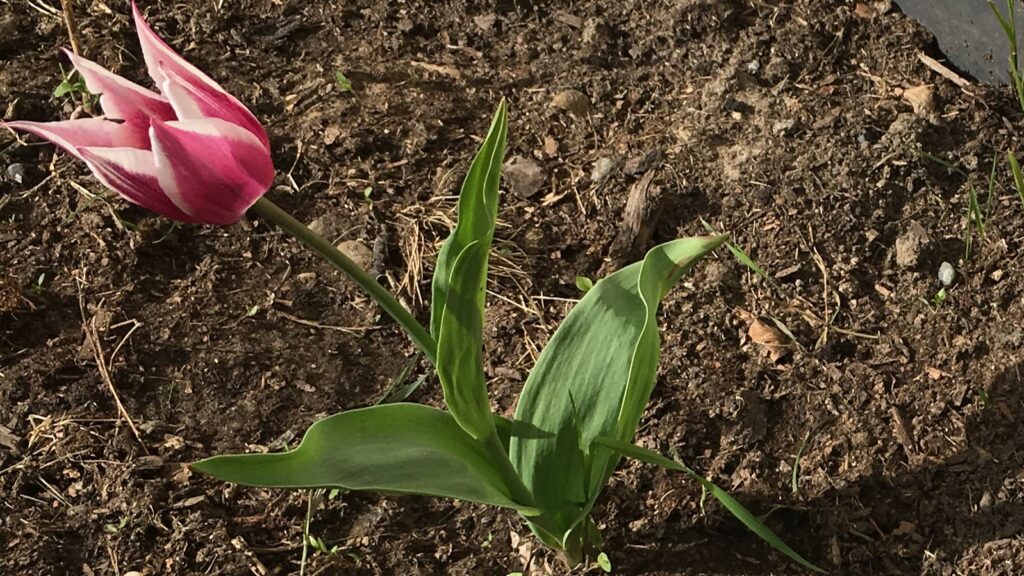
a pink pointy tulip probably pinochio

Later, I did a little more research into hardier bulbs and ones that would multiply, and I planned ahead and ordered them. They included Plaisir, Purple Lord, Alibi and Violacea tulips. Most of these tulips (maybe all) bloomed nicely. In springs three and four, they continued to multiply and survive.

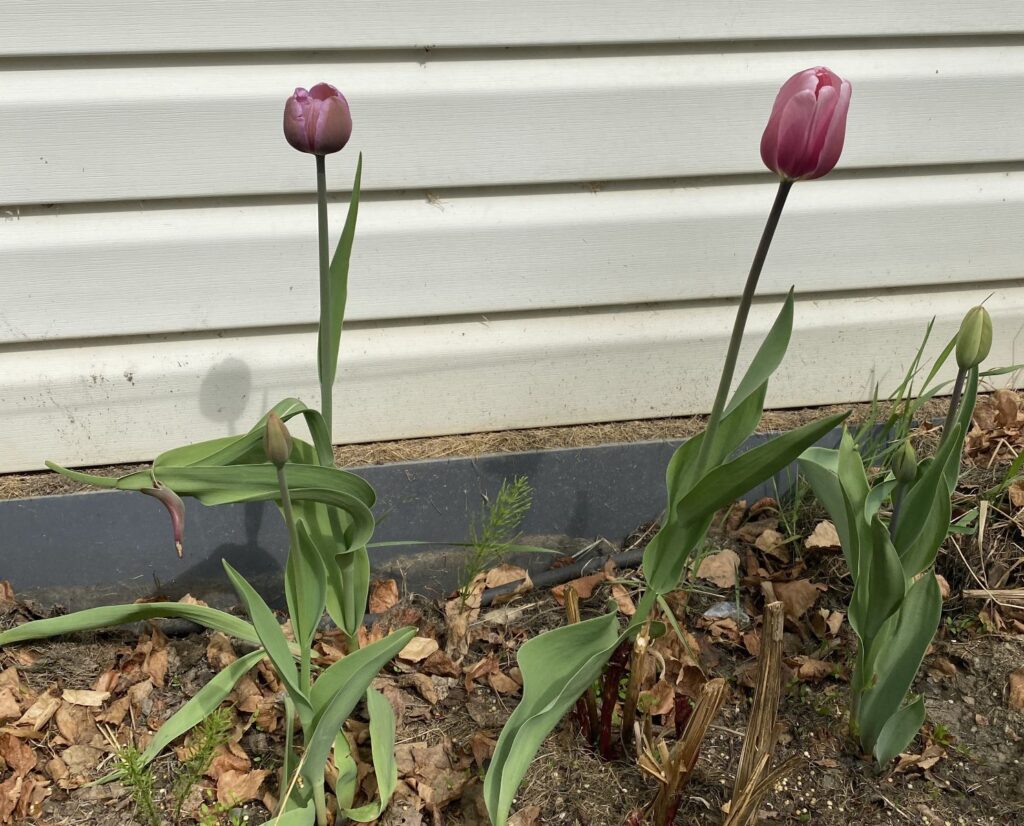
purple tulips blooming in a bed
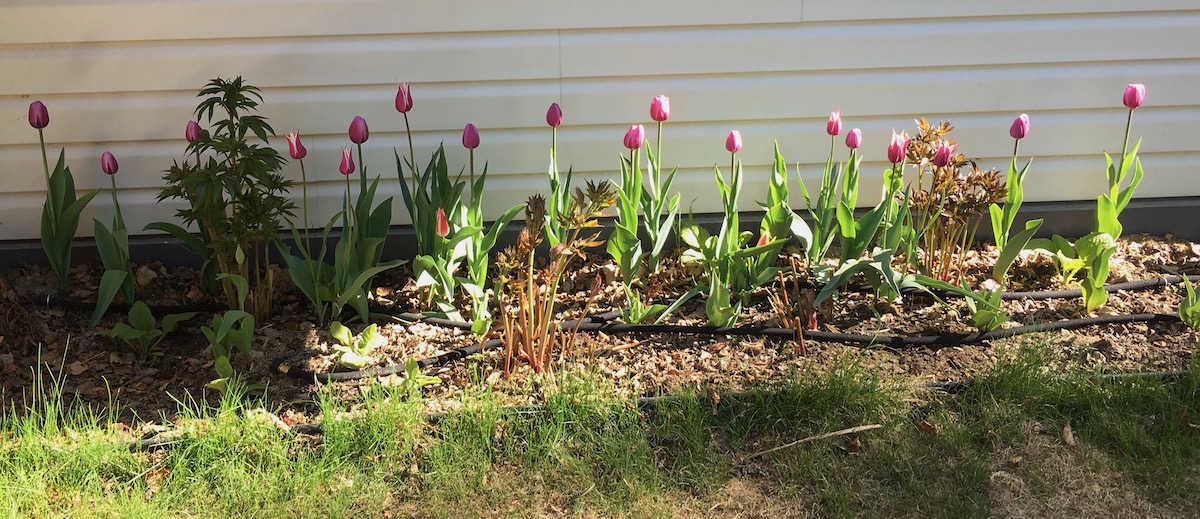
Purple Lord and Pinochio tulips bloom in a flower bed close to my house. You can also see peony plants emerging.

The first year the tulips are most likely to bloom, if you purchased nice, healthy bulbs. I planted Violate tulips in a bed that was not next to the house and exactly zero emerged, let alone bloomed. Because this garden bed doubled as our snow dump likely played a role in this.

The Georgeson Botanical Garden trialed a smattering of flowering bulbs in the 1990s. Of the tulips, Tarda tulip emerged from the winter with the least amount of injury and survived more years than other tulips at the garden. Bright Gem, United States, and Persian Pearl survived, but not unscathed, from the winter. 

In general, Scilla tends to winter over well in Fairbanks and sometimes grape hyacinth does as well. Snowdrops are also hardy. But Scilla, grape hyacinths and snowdrops are too diminutive to satisfy my need for color after a long, white winter. And if the winter is particularly brutal with minimal snow cover, then only the hardiest will survive. In Northern Garden Symphony: Combining Hardy Perennials for Blooms All Season, Cyndie Warbelow recommends a showy allium called ‘Purple Sensation’ as another bulb to consider planting in the fall.

For bulbs, planning is key, especially for the first year. You’ll need to plant the bulbs two or three weeks before the ground is frozen. This will give them time to establish roots, without the shoots emerging. Warbelow recommends planting bulbs in late August to early September or when the soil temperatures are in the mid to low 50s (Fahrenheit).

Warbelow also recommends planting bulbs just 1-3 inches deep so that they are in the layer of soil that thaws first in the spring. The standard recommendation is to plant tulips and daffodils 5-6 inches deep and smaller bulbs like Scillas and grape hyacinths, 2-3 inches deep. If the ground is wet when you plant the bulbs, there is no need to water, but if it’s dry you should water them a bit. Well-drained soil is ideal, especially if it is a very wet fall because the bulbs could rot. Incorporate a little fertilizer before planting—organic or slow-release works best since the bulbs will use it in the spring. Adequate snow cover or mulch is a must for Fairbanks. These types of bulbs require a jolt of cold—but they don’t need 40 below cold, which, if not mulched properly, could likely kill the bulbs. What Fairbanks does have going for it is generally dry conditions and sometimes hot summers.

It can be tricky to find bulbs when you need them. You might spot them at grocery stores and local greenhouses, but they may not be the variety you want or the hardiest varieties. It’s easy to find myriad varieties online, but many companies don’t ship to Alaska. If they do ship to Alaska, they may very well ship them too late—when the ground is frozen or nearly frozen and covered with snow. So double-check that the company will ship bulbs to you earlier than to other customers.

In the spring, peel back the mulch, water, and fertilizer with a slow-release or organic fertilizer. To encourage the bulbs to naturalize and multiply, cut the flower stems after they’re past their prime. Cut the leaves back only after they’ve withered so the bulbs can store nutrients for next year. If they survive the first year and begin to multiply, then you can treat them much like you would treat your other perennials. Some bulbs tend to multiply better than others. If they do multiply, in the fall you can divide the bulbs and plant either right away, giving them more space than if you had not divided them, or store cool and dry to be planted later, but no later than a year.

I have my bulbs planted in a bed with peonies and also usually interplant some showy annuals. This provides nice, successive color. I’m already looking forward to their bright show!

Previously published in the Fairbanks Daily Newsminer Septemper 9, 2017. Updated February 10, 2022.

When a Moose Invites Itself for Dinner

If your garden isn’t fenced and you haven’t had a visit or two from a moose, count yourself lucky. It’s never too late to fence in your garden and prevent an unwanted visit from a moose. Once they have feasted on your produce, it will be harder to keep them from coming back. Moose are the biggest and most destructive pest in Alaskan gardens. The obvious way to keep them from eating your garden is to build a fence, 8- to 10-feet-tall, strong and possibly even electrified at the top. However, you might not want to fence your garden, for example, if it is scattered across your property, you don’t want to block your view or you can’t afford it. In that case, the following alternative methods may help.

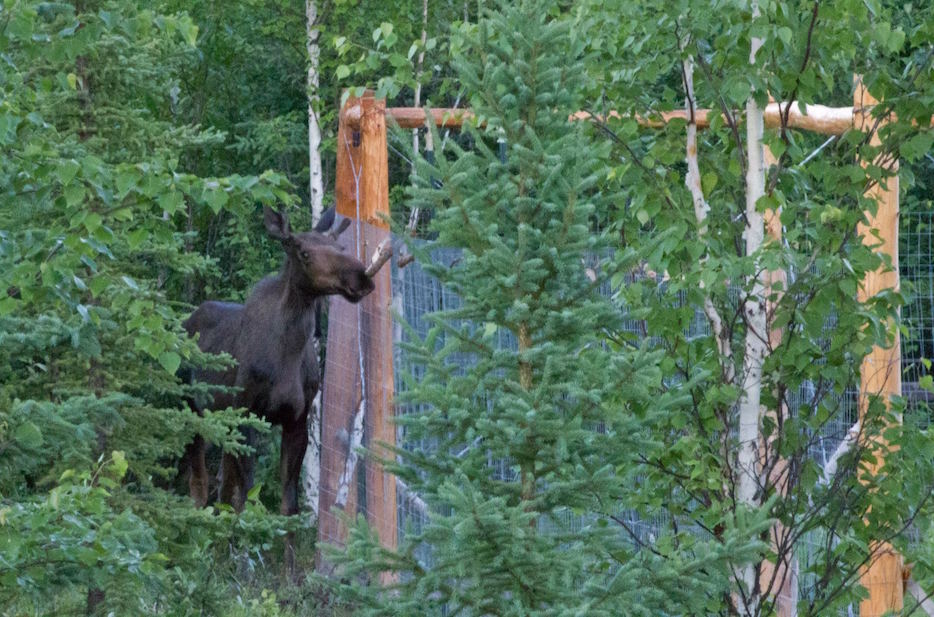
A young bull moose stands just outside Heidi's 8 foot tall garden fence

This moose provided some extra motivation to work hard and quickly to build a moose fence. He walked around the entire perimeter of the fence looking for a way in. The moose did eventually find a way in because our gate was too short. We had to add additional fencing above the gate and duck when we went in.

Moose eat some things because they’re there, others they gravitate to. They are particularly fond of cabbage, broccoli, cauliflower or almost anything in the Brassicaceae family, and peas, but their palate is not limited to your vegetable garden. They’re also fans of flowers, shrubs and trees. The Alaska Department of Fish and Game lists trees and shrubs that are frequently damaged by moose, such as apple and crabapple trees, and those that are only occasionally damaged by moose, such as lilac and maple trees. Continue reading

Growing Turnips, Radishes, and Rutabagas in Alaska

The Brassicaceae family includes a bunch of vegetables that grow super well in Alaska’s often cool weather. Some examples are broccoli, cauliflower, cabbage, turnips, daikon radishes, radishes and rutabagas. I’m going to talk about a few of the below-ground or root brassica vegetables now.

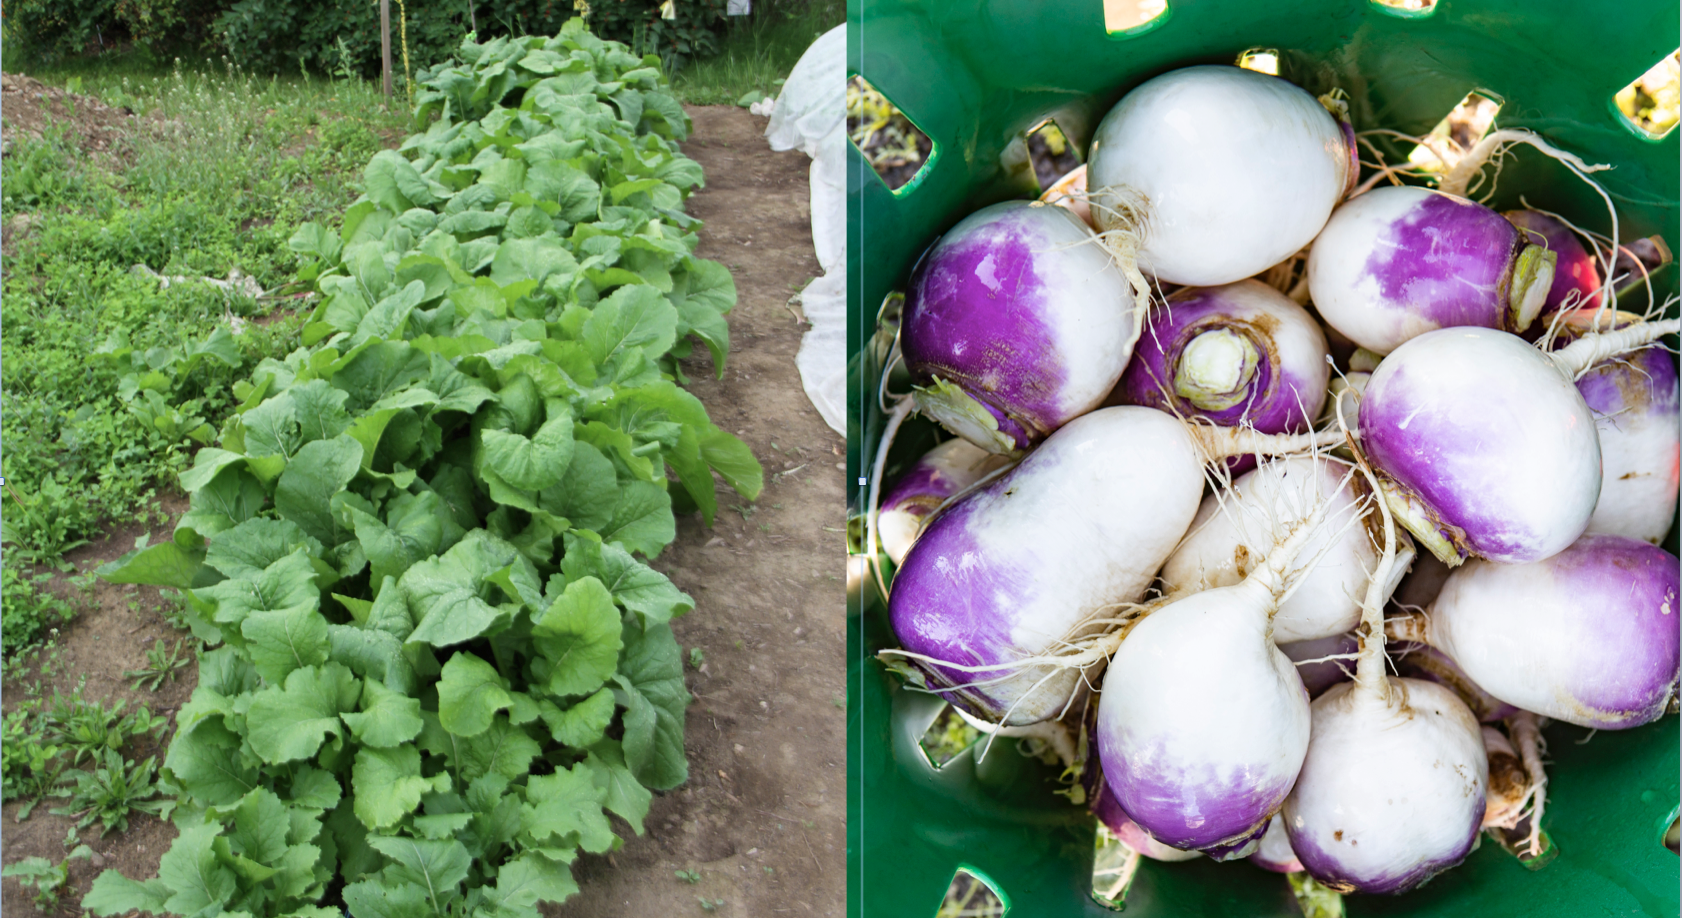
You can eat turnips and their greens. Left, photo by Glenna Gannon; right, photo by J.R. Ancheta.

When you think of a radish, you probably think of a small, round, radish (red on the outside and white on the inside) commonly sold in grocery stores. These mature super quickly — in under three weeks. Examples of this type of radish are Cherriette or Cherry Belle. But radishes come in many shapes, sizes and colors. Some are long and cylindrical while some are short and stubby. Some are purple and some are white. Daikon radishes are the biggest radishes. They are white and spicy and make a good addition to kimchi or Korean sauerkraut. Here is a nice comparison chart of specialty radishes. At the Fairbanks Experiment Farm, we trialed just a few Daikon radishes in 2017 and found that Alpine and Summer Cross No. 3 grew big and long respectively. Continue reading

Incorporating Entomology into Your Homeschool Program

Because of the continued uncertainty around how and when schools will open this fall and because I’m still working from home, like many parents, I’m making the choice to home-school. But with that choice comes many more decisions including what and how to teach at home.

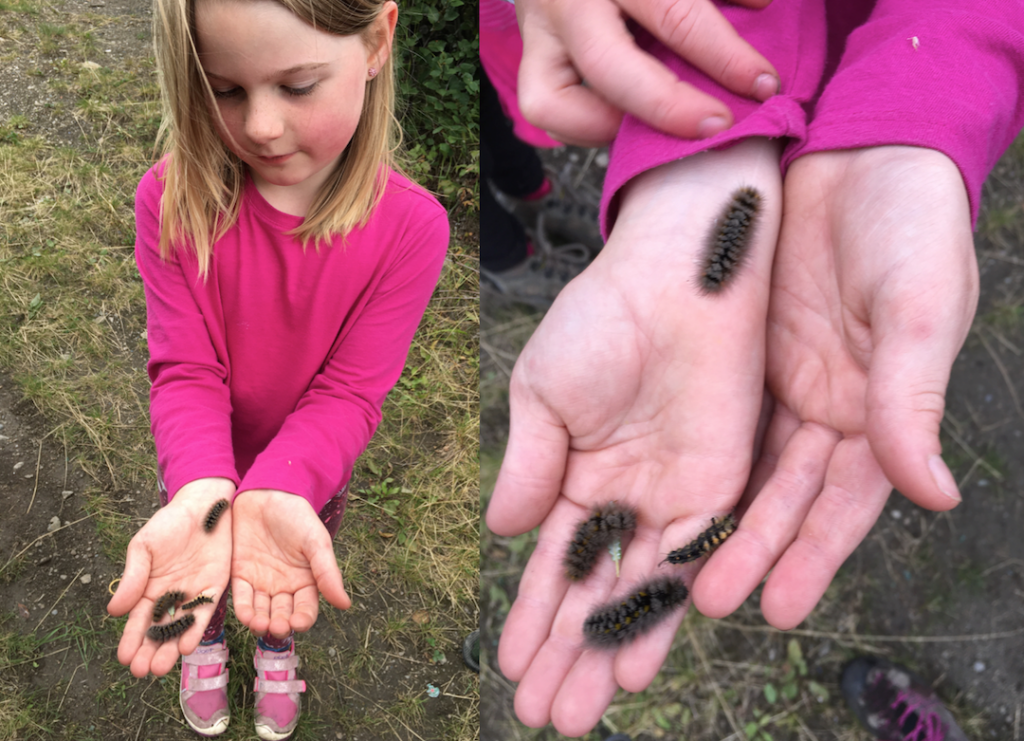
Heidi's daughter is holding rusty tussock moth caterpillars in a bright pink shirt.

On a recent hike, we found four caterpillars. Being low to the ground and the pace kids hike at is conducive to finding interesting insects and caterpillars. One of these caterpillars is the larval stage of the rusty tussock moth, while the other three are some type of owlet moth.

My kids have been collecting caterpillars and worms for years, and to build on their natural curiosity, I’m planning on continuing to explore the world of bugs with them.

To get some ideas on where to start, I talked to two experts — Derek Sikes, curator of insects and professor of entomology at the University of Alaska Museum of the North, and Kennan Oyen (formerly Jeannet), a postdoctoral fellow in Cincinnati, with a focus on conservation and insects. Kennan’s fascination began early while home-schooling.

I asked Derek and Kennan, where should you start? Derek said collecting insects is an obvious place to start, but there’s somewhat of a barrier to entry in terms of the cost to do a formal collection. An easier, cheaper way to start a collection is simply to photograph the insects. He then proposed uploading them to iNaturalist where an automated algorithm will actually help you identify the insects. In your observation, click on “suggest an identification” to see what it might be.  Continue reading

Growing Beets in Alaska

Beets are a versatile, tasty and nutritious root vegetable. Apparently, like cilantro, some people have a strong aversion to beets. You can eat both the root and greens of the beet. Beets are delicious steamed, roasted, pickled or fermented, and they also store well in a root cellar.

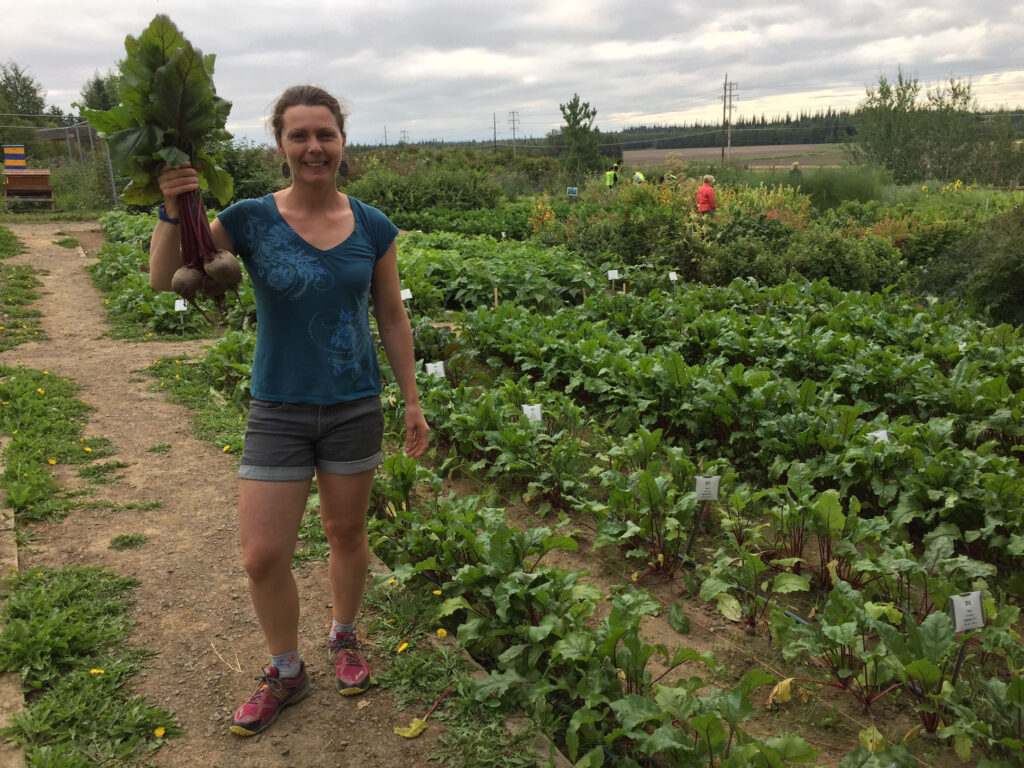
Heidi Rader shows off beets from the variety trials in Fairbanks. Photo by Glenna Gannon

Heidi Rader shows off beets from the variety trials in Fairbanks. Photo by Glenna Gannon.

In 2018 vegetable variety trials in Fairbanks, in descending order, Zeppo, Boro, Subeto, Pablo, Red Ace, Detroit Dark Red, Robin and Merlin yields were significantly higher than Falcon, Early Blood Turnip and Lutz Green Leaf. Zeppo was the highest-yielding variety at an average of 2.1 pounds/row feet. The higher-yielding varieties also had correspondingly high ratings in other areas, including plant vigor, bolting sensitivity and uniformity. The average size of Boro, Subeto and Zeppo beets (all hybrids) were over 5 ounces in 2018! Continue reading

Stretch Your Growing Season Into the Fall With Season Extension Techniques and Cold Hardy Vegetables

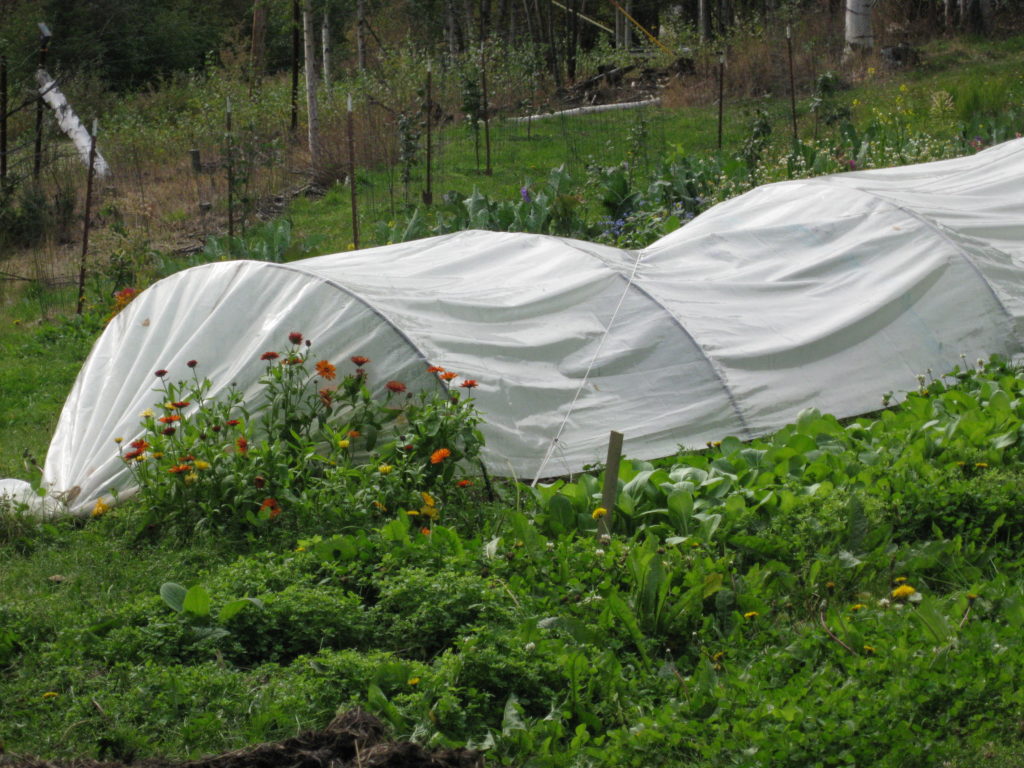
Although the growing season in Alaska is short, particularly in some areas, it’s getting longer. Still, from year to year, there are noticeable differences in the length of the growing season. Season extension techniques help deal with some of this year to year variability and make the most of your season. You can protect your plants from frost and cold using a range of season extension techniques: frost cloth, low tunnels, cold frames or hoop houses.

A garden in Alaska using frost cloth to create a low tunnel to help insulate plants from cool temperatures.

Frost cloth can be used to create a low tunnel to help insulate plants from cool temperatures.

Frost cloth, or row cover, comes in a variety of weights – the heaviest can protect plants down to 24°F.

Low tunnels are constructed from metal hoops and can be covered with frost cloth or plastic.

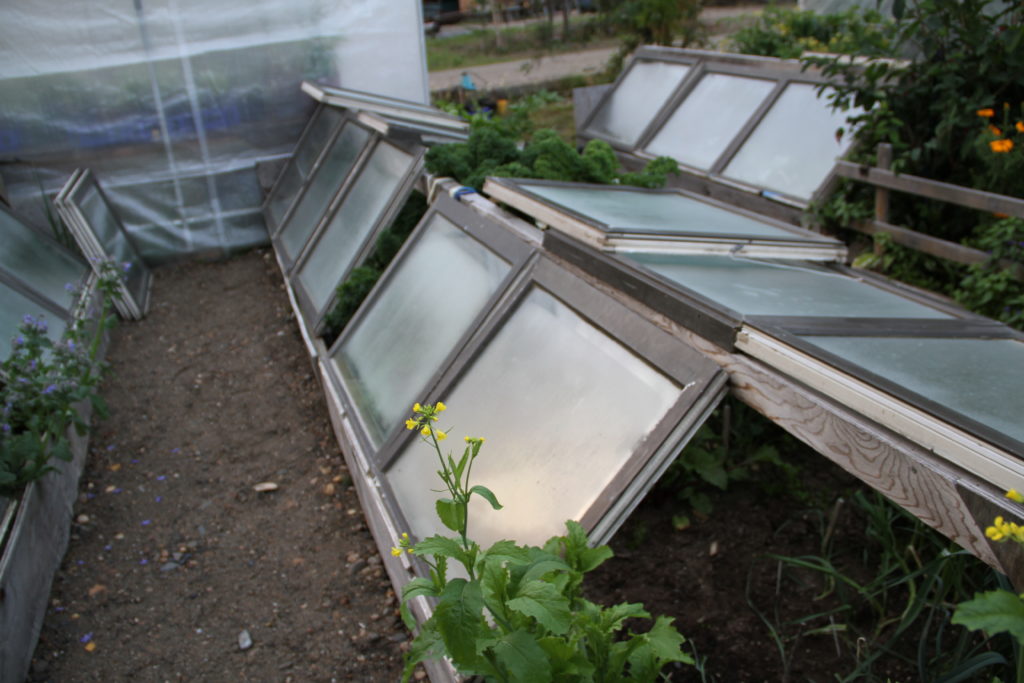
Cold frames can be insulated and/or heated (hot bed). You can even make a rudimentary cold frame with straw bales. If you’re willing to add heat to a cold frame (known as a hot bed) or high tunnel, you can extend the growing season even further into the winter.

Old windows can be used to create a structure called a cold frame. Here, a cold frame is erected over a raised garden bed.

Old windows can be used to create a cold frame.

Hoop houses and high tunnels are another option. They provide a little less protection than cold frames because they are usually constructed from simple structures and use a plastic covering.

If you have extra room in your greenhouse, you can plant cold-hardy vegetables in mid- to late summer, but it might be hard to take precious space from your tomatoes and cucumbers when they are at their peak and give it to the lowly corn salad (mache). Continue reading

Growing Peas in Alaska

My favorite type of pea is snap peas eaten fresh off the vine—a perennial kid favorite too. I’ve never intentionally grown shelling peas. I prefer growing things where I can eat most of what I grow—like with kale as opposed to Brussels Sprouts. Why give yourself the extra work of not only growing the pod but also shelling it? Maybe I’m just lazy because I don’t clean leaves and stems from my berries either. I guess if you have a dish you like that calls for shelled peas, then I would understand why you would do it.  Then there are snow peas where the entire pod is eaten. Their distinguishing feature is that they are flat, sometimes very large pods. So the basic categories of peas are snap, shelling, and snow but there are some grey areas.

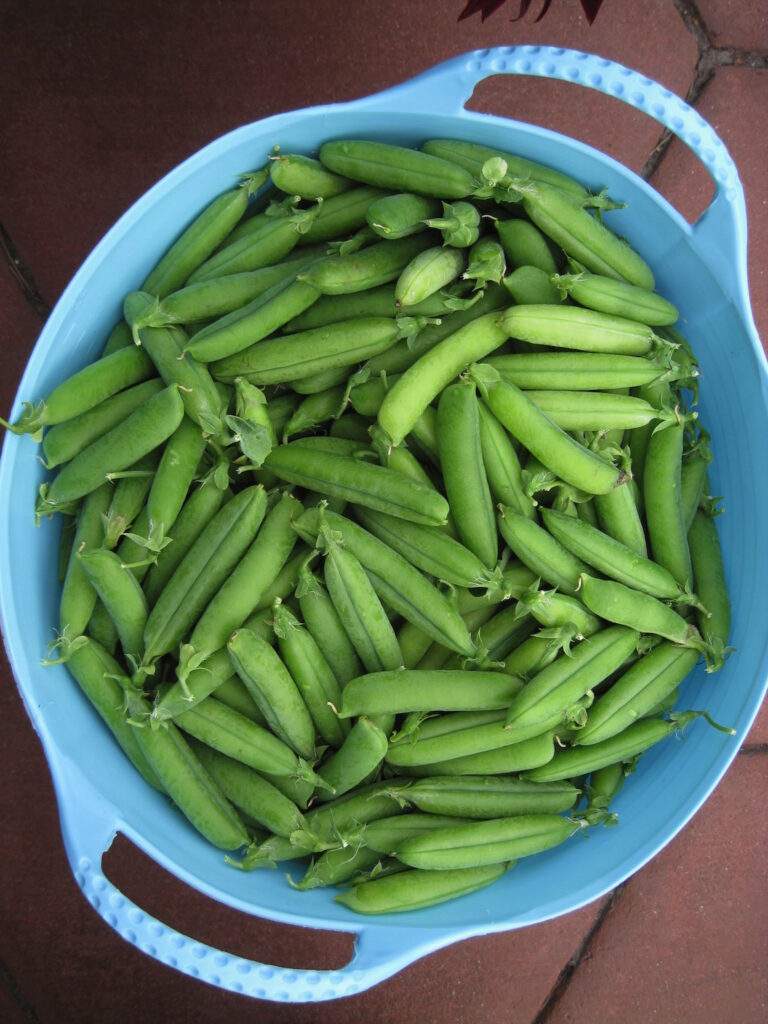
Freshly harvested sugar anne peas in a blue basket

I had a bumper crop of Sugar Ann Snap peas one year when I had beautiful, deep, moist silt loam.

One of the confusing things about garden crops is the somewhat fuzzy categories that have been developed and how they don’t always best describe the varieties or types that are being grown. Julie Riley wrote an excellent article on peas, and has some good ideas for how pea categories could better be described. Strawberries are another good example of wonky categories that I have written about before. Julie also talks about the importance of planting peas early and knowing what type of pea you’re growing so that you harvest at the right time. Continue reading

Beyond Strawberries and Raspberries—Try Currants, Honeyberries, Serviceberries and More!

Raspberries and strawberries are ubiquitous in Alaska gardens and I, for one, never tire of eating them.

But there are other lesser known types of berries that also thrive in Alaska that are worth trying. You might even find a new favorite.

Saskatoons (or serviceberries), haskaps (or honeyberries), currants and gooseberries are well adapted to Alaskan growing conditions.

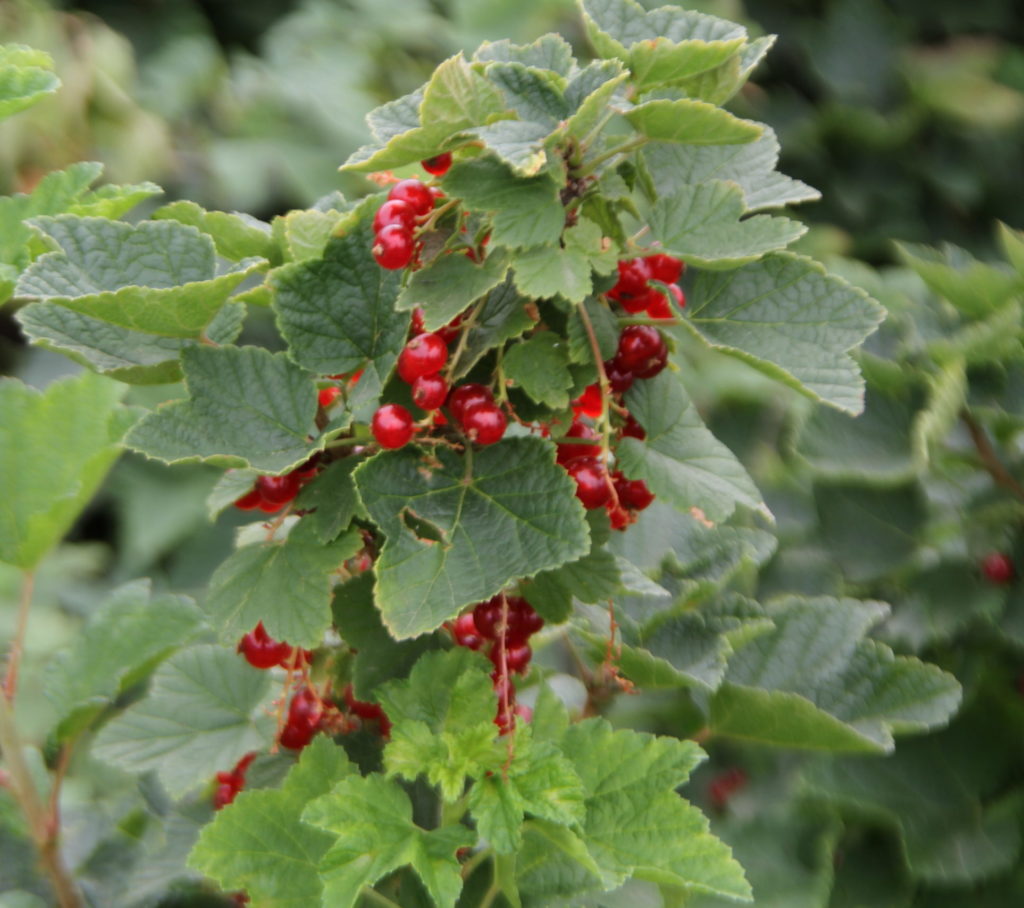
red currants growing on a bush

I love the tart, unique taste of currants. There are many varieties to choose from. They are a bit seedy, but the seeds can be eaten. They make an excellent jelly.

Saskatoons and haskaps are incredibly prolific and productive. They can be eaten fresh or in baked goods or preserves.

saskatoon bushes

Saskatoon or serviceberries are prolific. To me, they don’t compare to blueberries, but they’re a berry nonetheless.

Haskaps have the added benefit that they mature earlier than other berries, which extends the time you can be eating fresh berries. I love the tart flavor of currants, which is excellent when made into syrup or jam.

Growing berries is not as straightforward as growing lettuce or carrots. But at least you don’t have to plant them every year since they are generally perennial. Most berries benefit from full sun, mulching, compost, weed control, disease prevention measures, plentiful pollinators, good drainage and consistent watering. But berries vary substantially in their day/night length requirements, fertility needs, ideal pH, cold tolerance, required pruning regime and pollination strategies. Continue reading

Homemade Yogurt Offers Better Taste and Ample Savings

I like yogurt a lot. Not just any yogurt but yogurt that I have cultured. At any given time, I’ve had as many as four yogurt cultures going, plus kefir. They’re all plain and made with whole milk.

Yogurt sales in the U.S. approach nearly $10 billion a year. An aura of health surrounds yogurt, but to attract customers, yogurt companies are continually coming up with enticing new flavors like “coco loco”, “cinnamon roll” or “cookies and cream” that are loaded with sugar and artificial flavors and, in spite of yogurt’s healthy image, are actually closer to ice cream in terms of the sugar load.
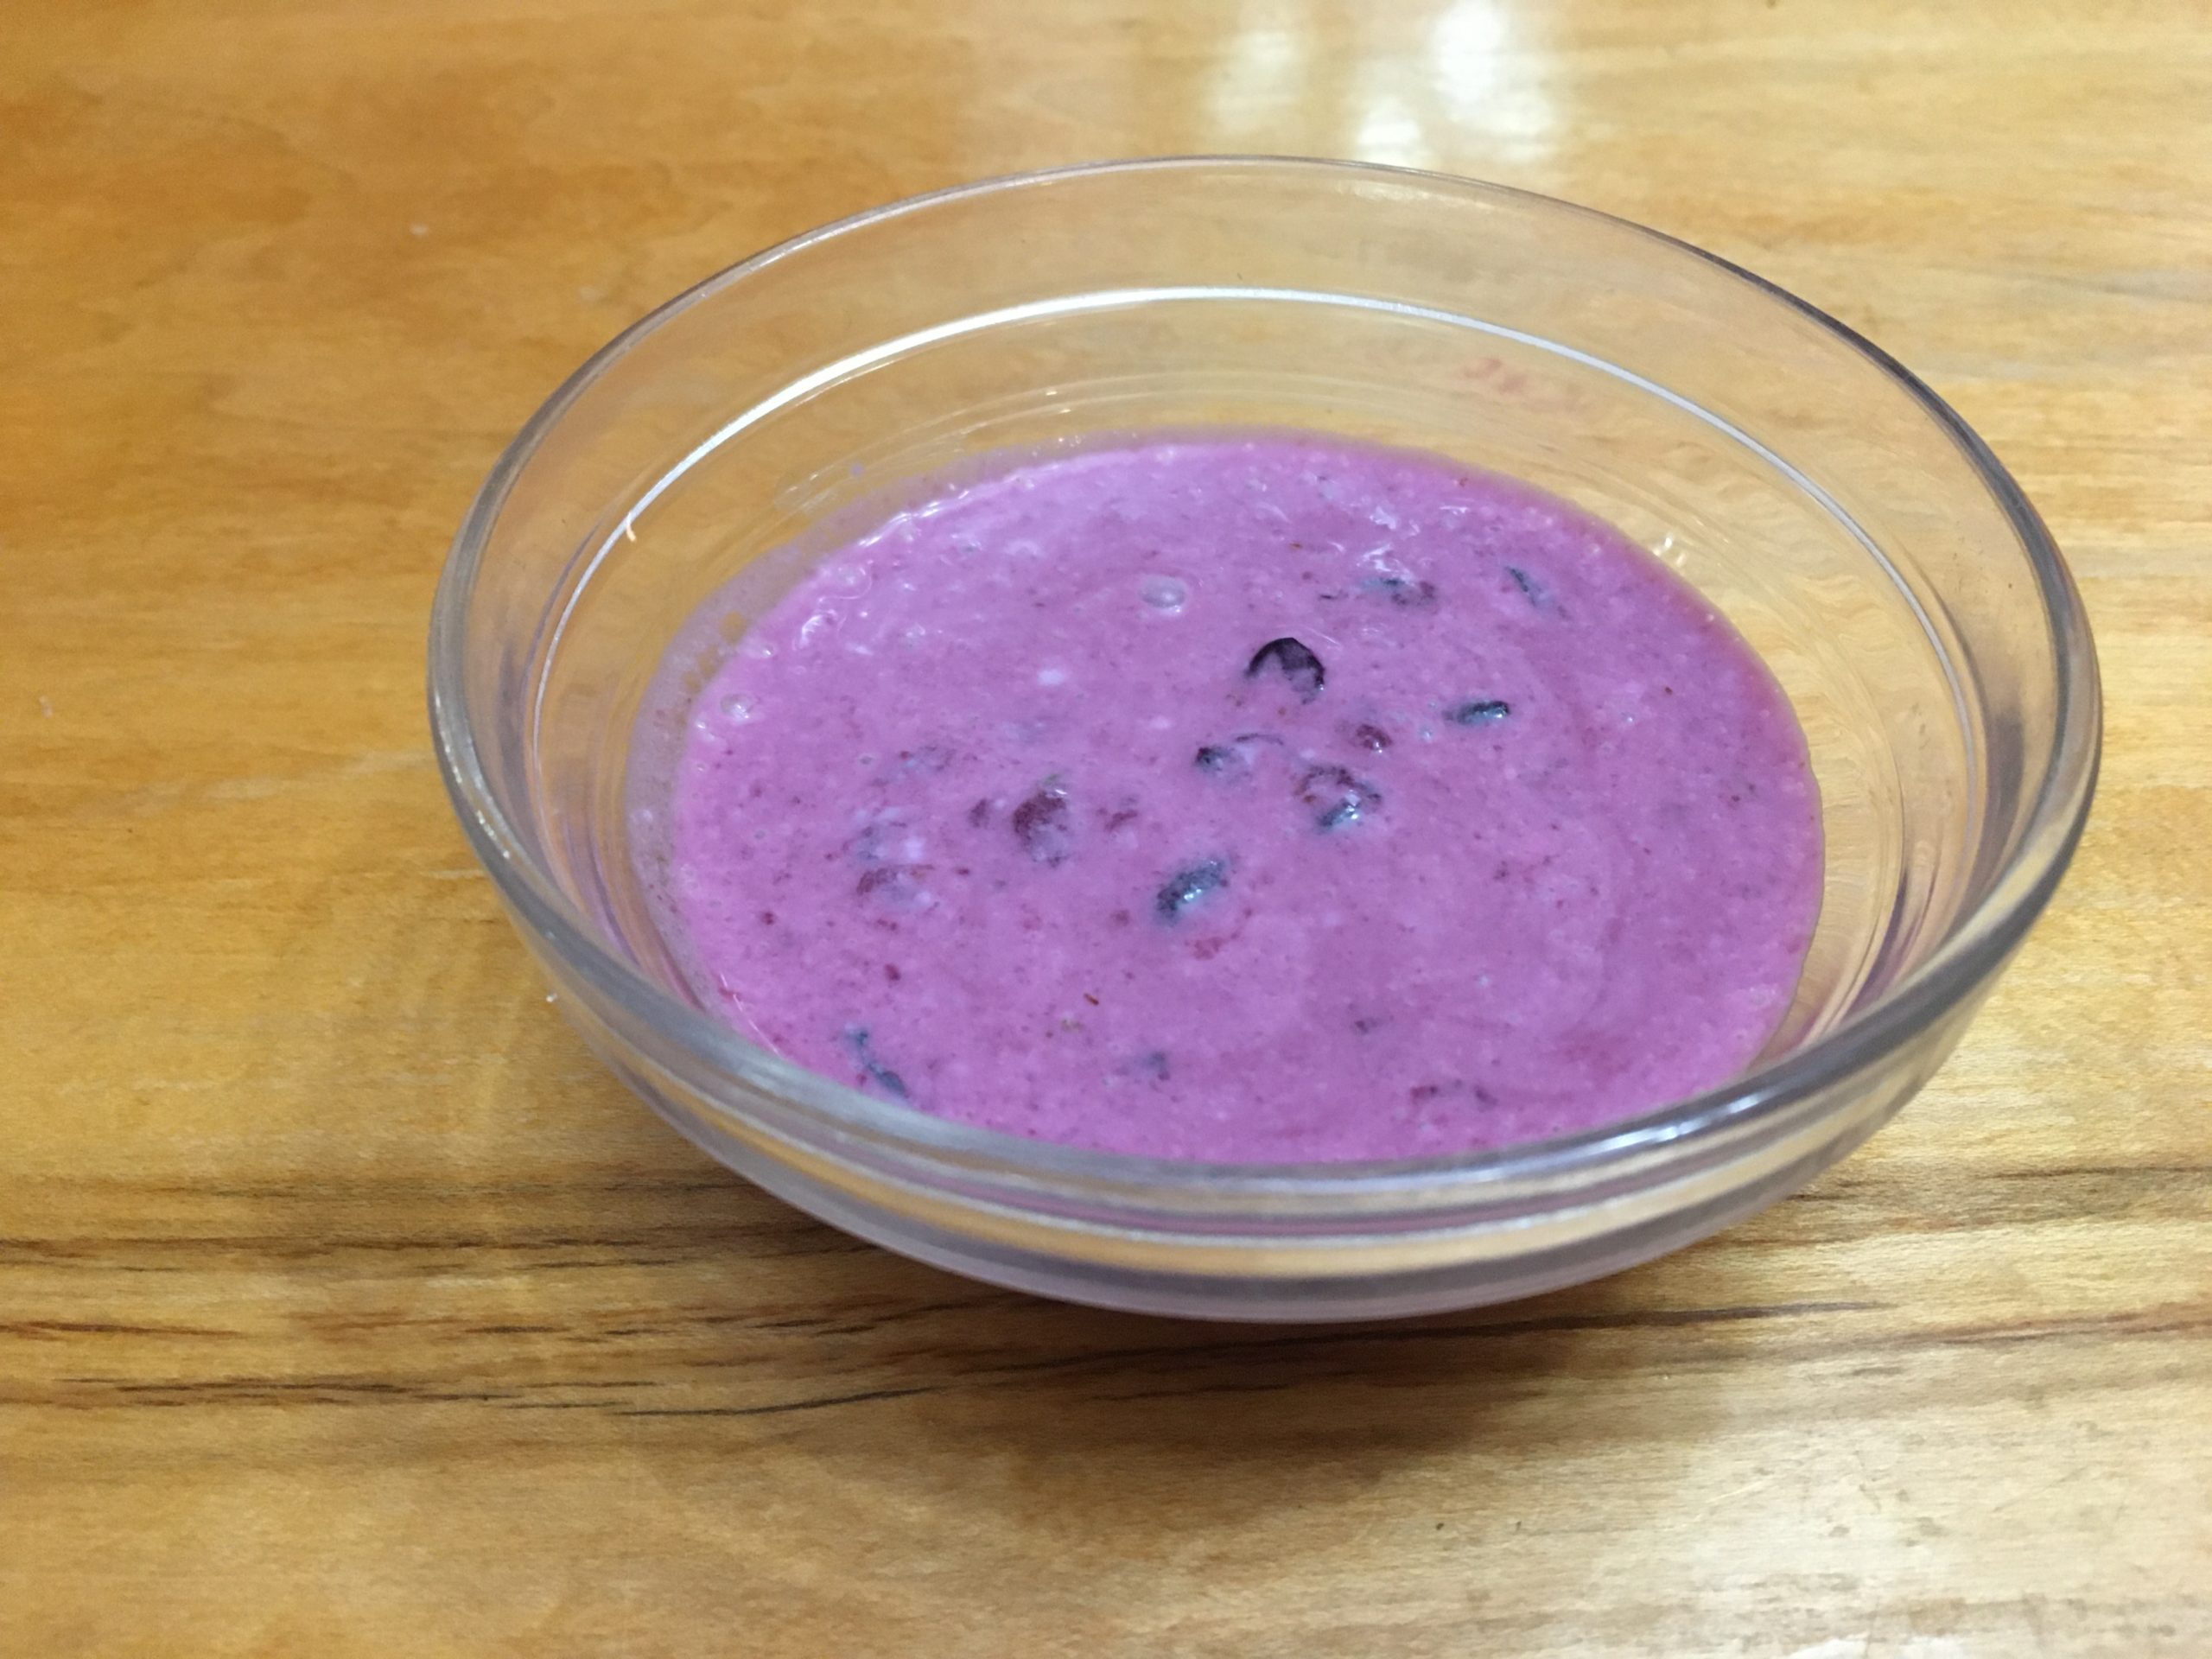
Bowl of homemade blueberry yogurt.

This is tasty blueberry yogurt I made

The best-kept secret is how easy it is to make your own yogurt. It does take time to make but not a lot of hands-on time. Instead of adding sugar and artificial flavors, simply varying the inoculation culture, fermentation time, and type of milk or cream produces yogurt with noticeably different tastes and textures. For example, I usually ferment my yogurt for 24 hours. Store-bought yogurt might be fermented for as little as eight hours. The extra fermentation time results in extra sour yogurt, which I love. Those who usually avoid lactose might find that yogurt fermented longer is more easily digested

Another reason to make your own yogurt? To save money. Here are some back-of-the-envelope calculations I made comparing the cost savings of yogurt made at home compared with buying it at the store.

Size of Yogurt Container Yogurt made at home with 1 gallon of $3 milk Yogurt made at home with 1 gallon of $6 organic milk Less expensive store-bought yogurt More expensive store-bought yogurt
6 oz. single serve 14 cents 28 cents 70 cents $2
Quart sized 75 cents $1.50 $3.60 $5

I should note that when you make unstrained yogurt, not much volume is lost, but making Greek yogurt, which requires that you strain the yogurt from the whey, does result in loss of volume, and that would influence these numbers. In addition to the cost benefits, making your own yogurt generates less plastic waste especially compared with single-serve yogurt.

So how do you actually make yogurt?

First, you need to understand a little bit about yogurt cultures. Heirloom cultures can be used repeatedly simply by saving a little yogurt from one batch and using it to make a new batch. This must be done fairly regularly to maintain the culture. But some cultures are sold for single-use. These cultures can’t be reused because they’re less diverse and stable. Commercially made yogurt is usually made with single-use cultures because they are more predictable. I only use heirloom cultures.  You can buy these online or at health food stores.

Another difference between yogurt cultures is the temperature at which they must be cultured – thermophilic cultures must be fermented at about 110-115 degrees F while mesophilic cultures can be fermented at room temperature. My favorite culture is Bulgarian and is thermophilic. I also use several mesophilic cultures that can simply be cultured at room temperature. These include Filmjölk, Viili, and Matsoni.

To make yogurt with a thermophilic culture, you could use a yogurt maker, an instant pot or simply a pre-heated cooler. If you use a cooler warmed with hot water, monitor it with a digital thermometer. Here’s how to make it (all temperatures are in Fahrenheit):

  1. Heat the milk to 180 degrees
  2. Cool the milk down to 110-115 degrees. Once cooled, mix in 1 tablespoon of culture per quart of milk.
  3. Keep the milk at  110-115 degrees for at least eight hours and up to 24 hours.

Mesophilic yogurt is much easier to make. Simply save about one or two tablespoons of the previous batch of yogurt and add it to more cream, milk or a combination of the two. Ferment at room temperature and in about a day or so it will be finished. One of the things I use the mesophilic cultures for is making crème fraîche. This works well because it wouldn’t make sense for me to make a whole gallon of  crème fraîche,  which is the capacity of my instant pot and it would take a lot more effort to use a thermophilic culture for a small amount of crème fraîche. Instead, I make small batches in pint jars.  
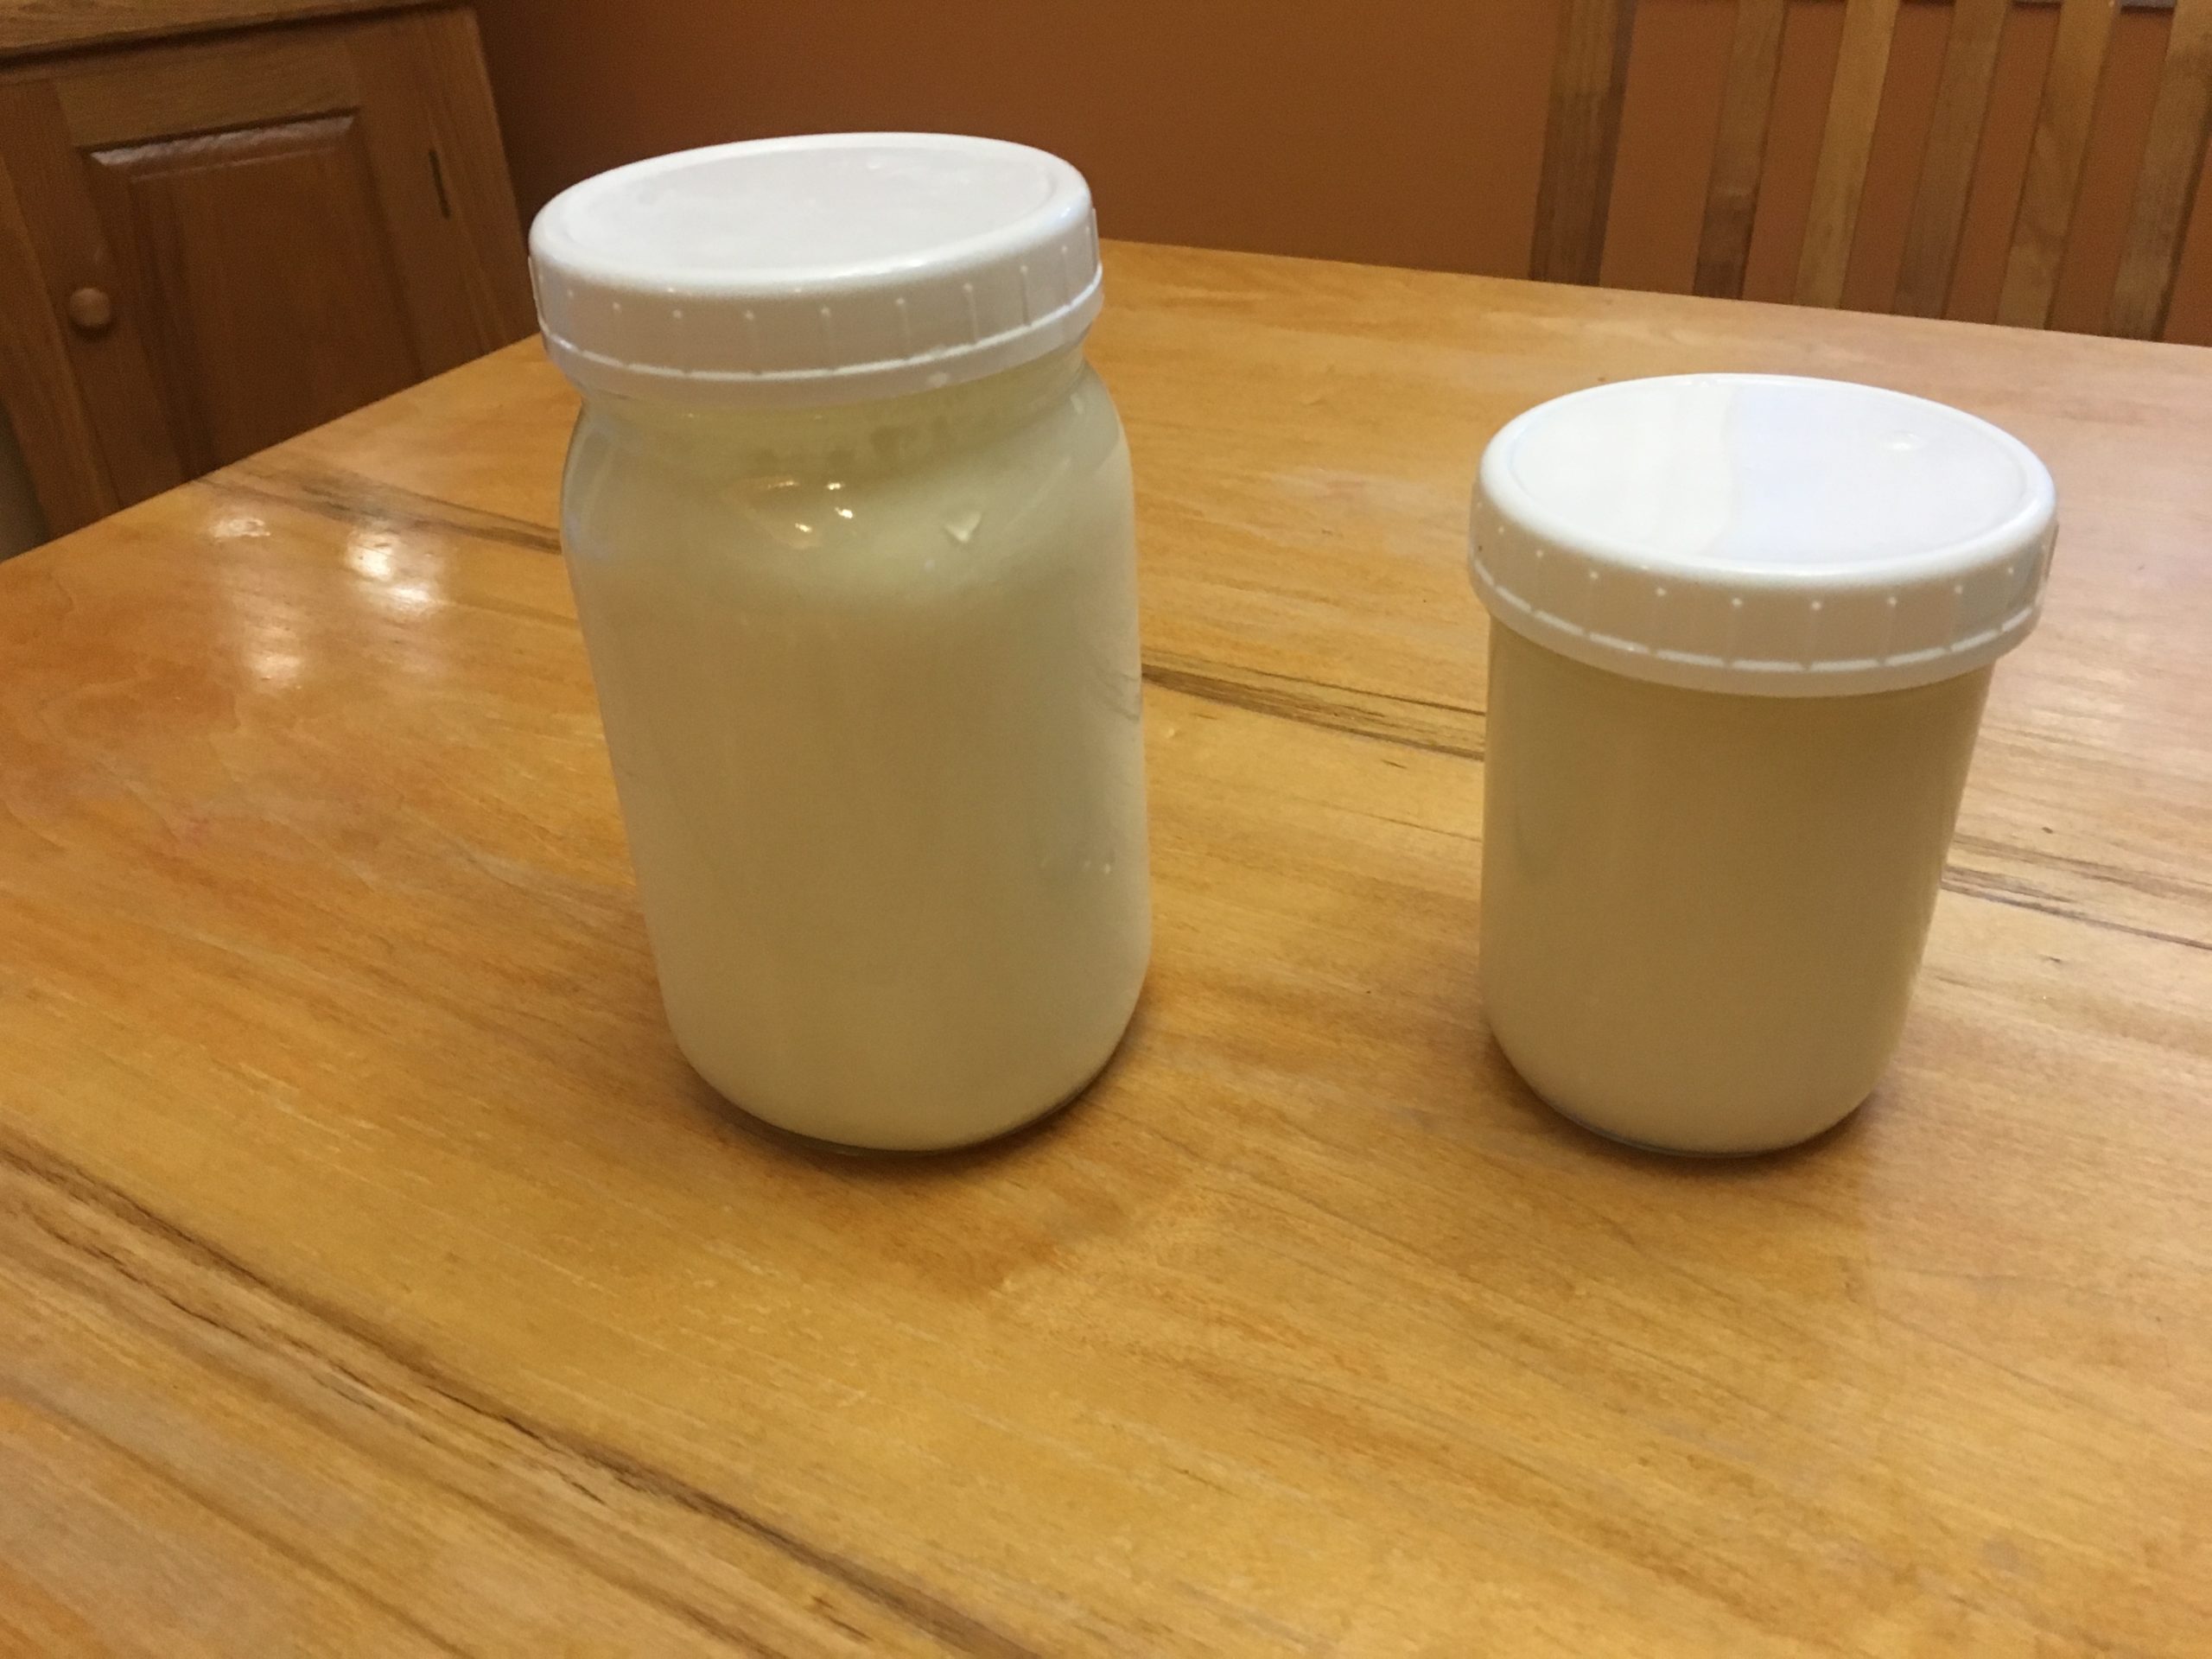
A pint-sized jar of homemade cream friach next to a quart-sized jar of yougurt.

I usually make smaller batches of creme fraiche, a naturally thickened cream that provides a tart, buttery flavor.

Kefir is also fermented at room temperatures, but kefir grains are added to inoculate the yogurt instead of simply a couple of tablespoons of kefir. Add one tablespoon of kefir grains to one quart of milk and let ferment until thickened. This usually takes at least 24 hours for my kefir. The grains are colonies of bacteria and yeast that continue to grow and multiply when you make kefir. If you let kefir ferment too long, your kefir might become a little bit alcoholic and fizzy because of the yeast. Single-use cultures are sold for making kefir, so, if you can, find the kefir grains if you want to make multiple batches of kefir.
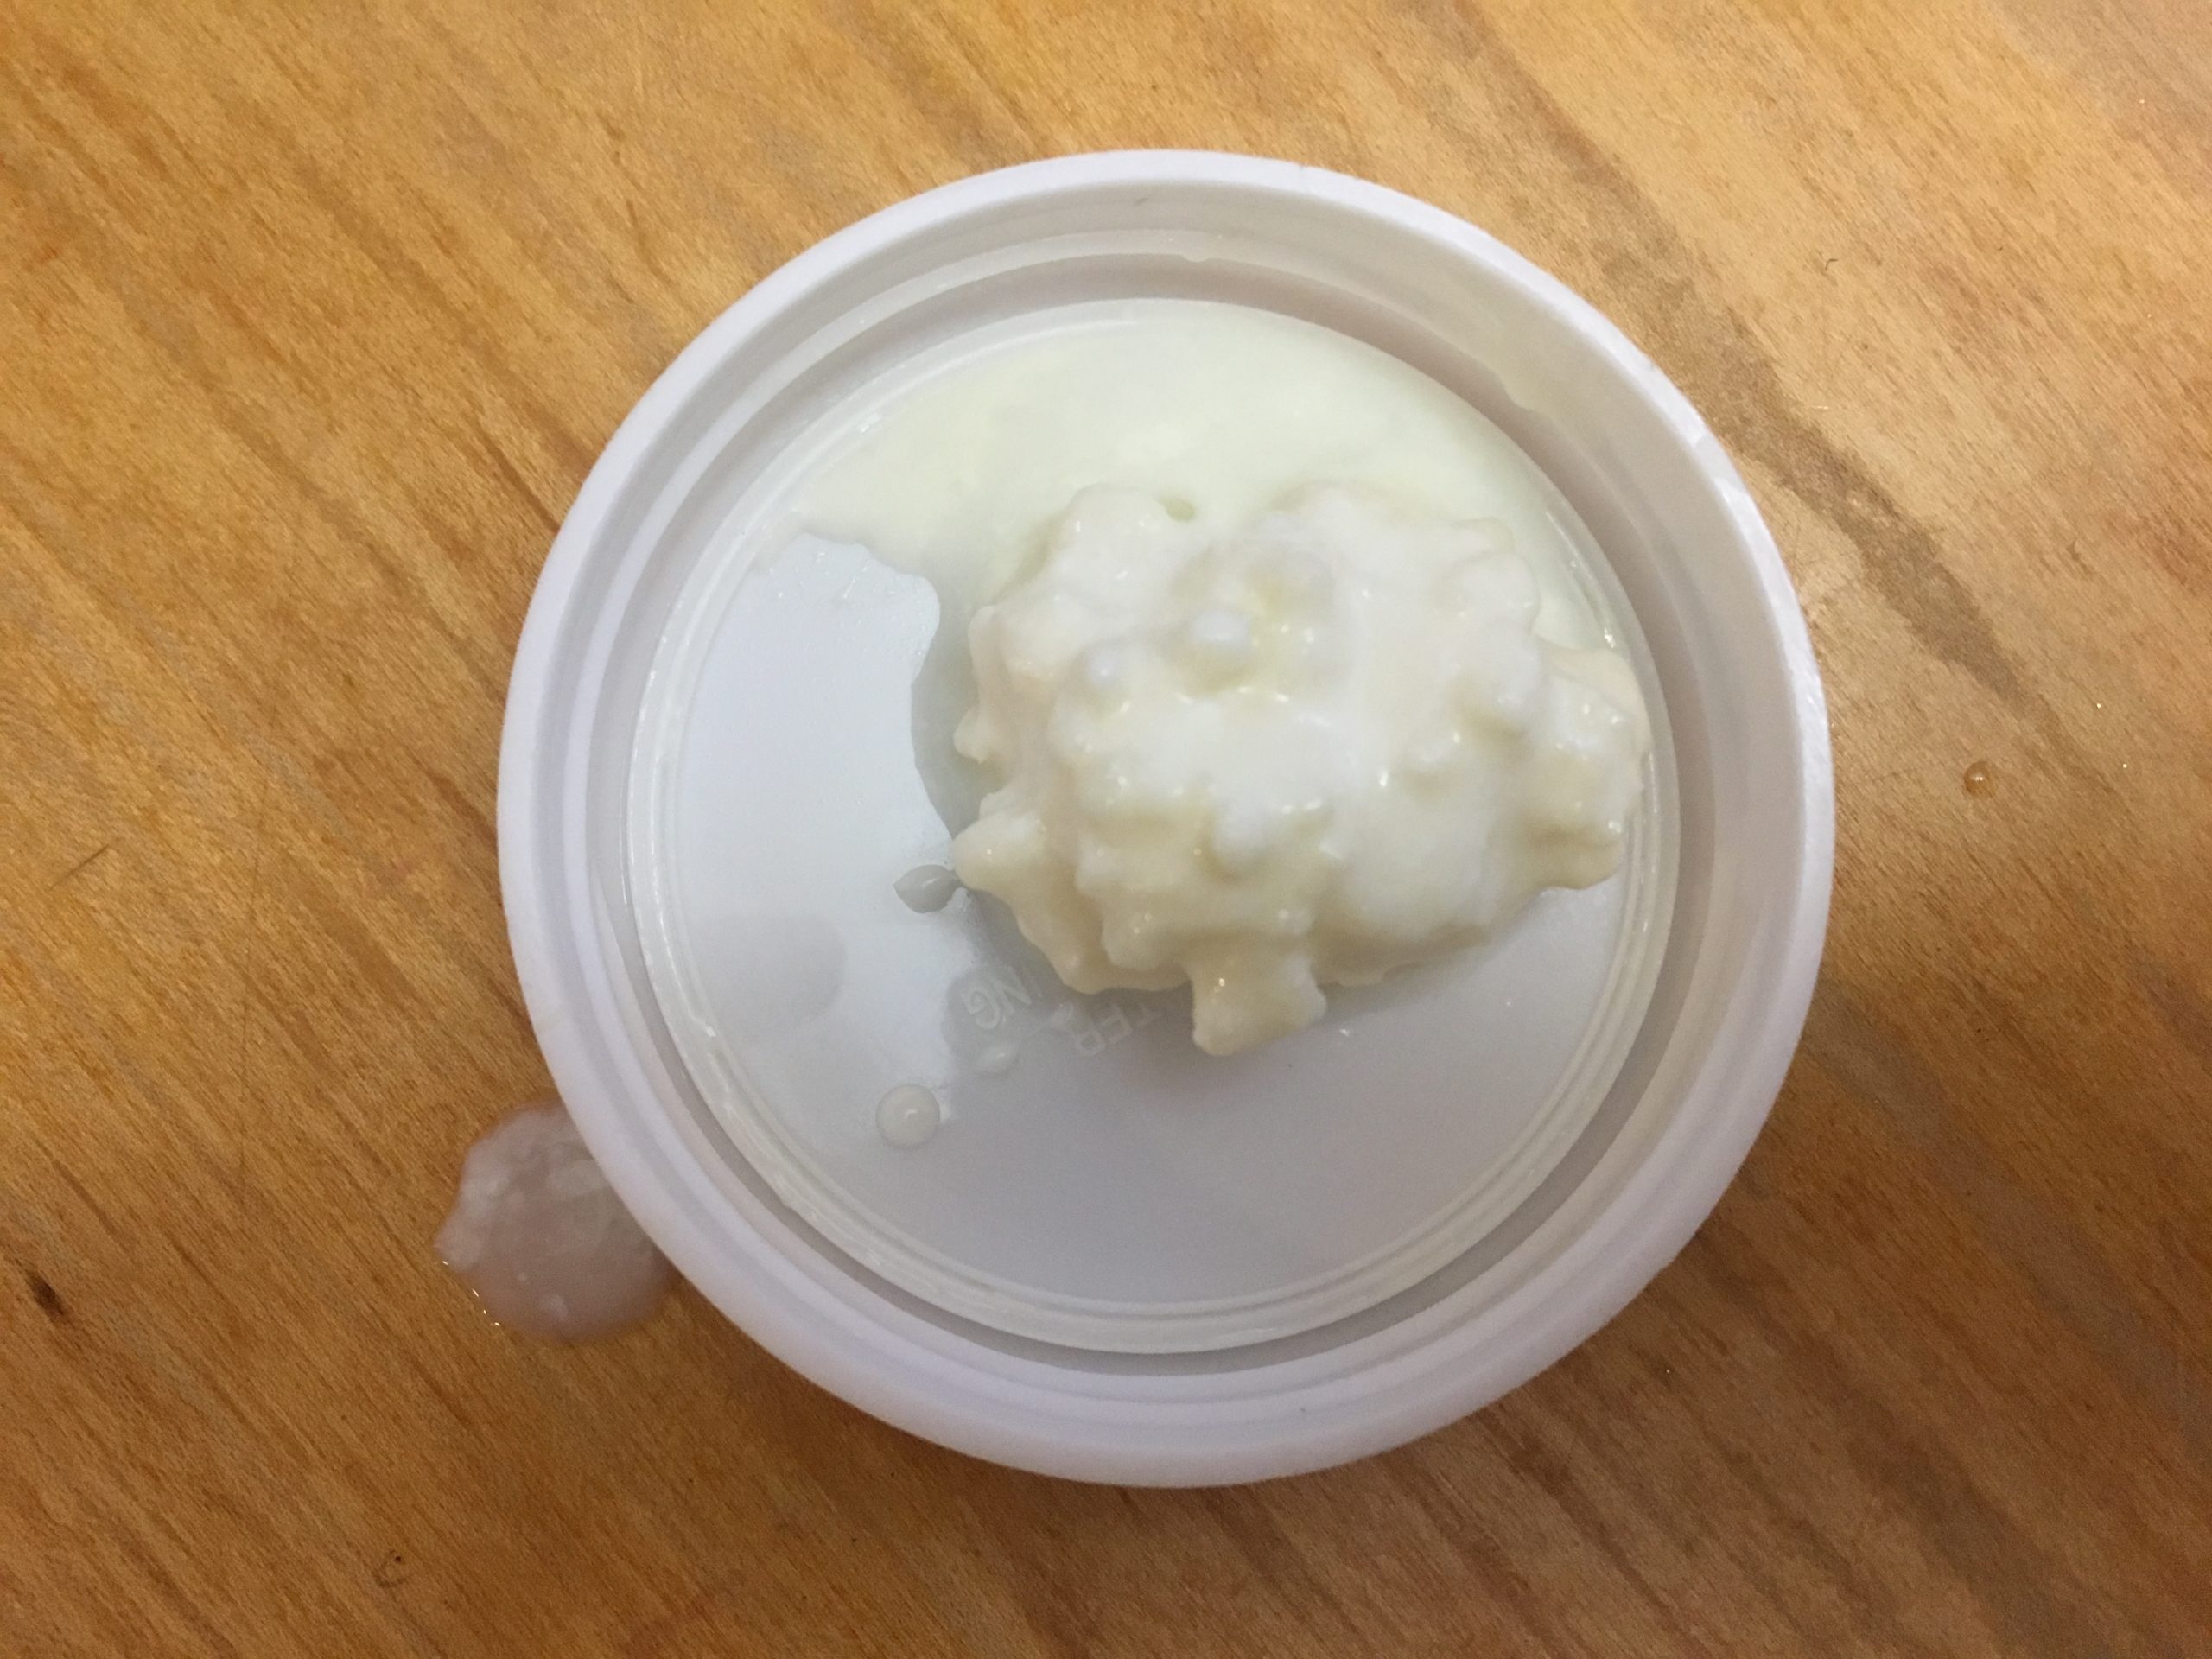
Colony of fresh kefir up close.

Kefir is thinner than yogurt but has a similar creamy-but-tart taste. It is fermented at room temperature.

If you want to make thick, nonfat yogurt, try making Greek yogurt or add a thickener like powdered milk, gelatin, pectin or tapioca starch. Be aware that thickeners may limit your ability to reuse your culture. Heavy whipping cream can also be used to thicken yogurt.

Making your own yogurt is easy, tasty, healthy and will save you money so give it a try!

For additional instructions, check out UAF Extension’s publication on making yogurt at home.

Previously published in the Fairbanks Daily News-Miner October 27, 2019.